Ceramic Glaze for Beginners: Types, Cones, Food-Safe Labels and Faults
A ceramic glaze is a coating that fuses into a glass-like layer in the kiln. Pick a ready-made glaze whose cone matches your clay and kiln, read the food label before it goes inside a mug, and fire a test tile first.
By Lionel Rutledge ·
On this page
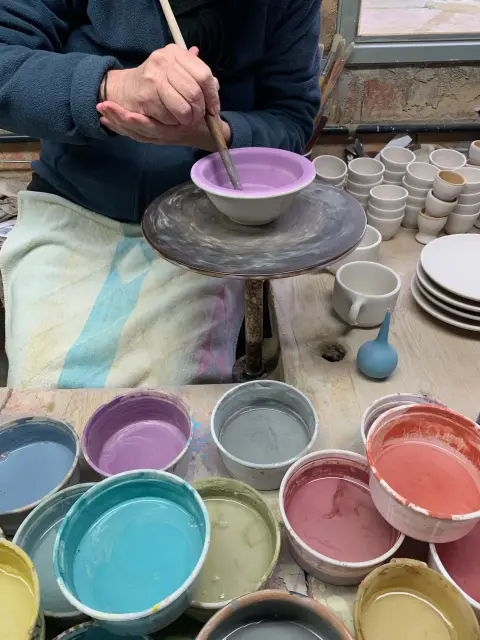
A ceramic glaze is a coating that fuses into a thin, glass-like layer on the clay in the kiln. For a first glaze, pick a ready-made one whose cone matches your clay and your kiln. If it will touch food, check that its maker labels it for food surfaces. Then fire one test tile before you glaze a pot you care about.
That is most of it. The rest of this guide covers what a glaze is made of and the main types. Then come the labels on the jar, how to put glaze on, and what the common faults mean. If you have not chosen a clay or a place to fire yet, start with our pottery guide for beginners. It sits with our other guides to making useful things by hand.
What is in a glaze?
A glaze is three kinds of material plus color. Digitalfire, Tony Hansen's ceramics reference, sorts glaze oxides into those that "flux, stabilize and build glass":
- Silica builds the glass. Digitalfire calls it "the glass former".
- Fluxes make it melt at kiln temperature. "Fluxes are materials that lower the melting temperature of a glaze". Feldspar and frits are common sources.
- Alumina stiffens the melt. Digitalfire says it plays "an important role" in stiffening the melt, so the glaze flows less.
- Colorants and stains tint the glass; opacifiers make it opaque.
You do not need this to buy a jar. It does explain why the cone matters: the choice and amount of flux largely decide the temperature at which a glaze melts, and the label's cone is that range.
Types of ceramic glaze, and which to buy first
Glazes are sorted four ways on a shop shelf. For a first jar, choose by firing range first, then by finish.
Scroll sideways for all 3 columns.
| Sorted by | The types | Good first buy? |
|---|---|---|
| Firing range | Low fire (cone 06–04), mid fire (cone 5–6), high fire (cone 10) | Whichever your kiln fires. See the cone table below |
| Finish | Gloss, satin, matte. Digitalfire defines matte as "a glaze that is not glossy" even though it has melted | Gloss is the easy choice for food surfaces; satin and matte for outsides until you know the glaze |
| How much you see through it | Clear (transparent), translucent, opaque. Digitalfire notes that "Every glossy ceramic glaze is actually a base transparent with added opacifiers and colorants" | A clear glaze is the most useful single jar if you plan to use underglaze |
| Behavior in the kiln | Stable glazes stay put. Fluid or "reactive" glazes move, pool and break over texture. Crackle glazes are, in Digitalfire's words, "intentionally crazed" and not for functional ware | Stable first. Fluid ones run, which is a cost if your firing service charges for shelf repairs (see below) |
Some names on labels describe a traditional look: celadon (pale green or blue), tenmoku (dark brown-black), shino, copper red. Celadon and copper red are classic looks of reduction firing, where a fuel-burning kiln restricts oxygen. Digitalfire lists "celadon greens and blues" among reduction effects. Digitalfire says reduction "requires a specially designed fuel-fired kiln", and that copper "fires green in oxidation" but turns red in reduction. Digitalfire says electric kilns are "synonymous with oxidation firing". If you fire in an electric kiln, a jar photo shot in a gas kiln can look different from your result. Check which atmosphere the swatch was fired in.
Glaze also comes in two formats. Ready-mixed liquid in pint jars suits brushing at home. Dry powder in larger bags is mixed with water for studio dipping buckets; AMACO sells HF-9 clear as a 25 lb dry mix for dipping. Powder means dust, so start with liquid (see the safety section).
Underglaze or glaze: which do you need?
Use underglaze to paint color and detail, and glaze to seal the surface. Many beginners use both: underglaze for the picture, a clear glaze over it.
Digitalfire describes underglazes as "heavily pigmented ceramic compounds", usually brushed onto leather-hard clay or greenware and "covered with a transparent glaze". A glaze melts more and gives the glassy gloss, satin or matte surface.
Scroll sideways for all 3 columns.
| Underglaze | Glaze | |
|---|---|---|
| What it does | Adds color and drawn detail | Seals the clay with a glassy layer; can also carry color |
| Finish on its own | Matte. AMACO describes its Velvet underglazes as a "velvety smooth, unglazed finish" | Glossy, satin or matte, depending on the glaze. Mayco says Stroke & Coat "will fire to a gloss finish without clear glaze" |
| Does it move in the kiln? | Hardly. AMACO lists its Velvets as "Stiff - won't run when fired" | It melts, so it can flow, especially when thick |
| When you apply it | Greenware or bisque. AMACO's Velvet sheet says "wet, leather-hard, or bone-dry ware" or bisqueware | Usually on bisque. Some, like Stroke & Coat, also go on wet clay |
| Food surfaces | Not on its own. AMACO's underglazes "are not for food contact unless covered with a glaze" tested for lead and cadmium release | Only if the maker labels that glaze for food surfaces |
My advice: for a first mug, keep the underglaze drawing on the outside, under a clear glaze. Put one plain, food-labelled glaze on the inside and the rim.
Match the glaze to your clay and your kiln's cone
Buy a glaze labelled for the same cone your clay and your kiln fire to. A cone number is a measure of heat-work; Orton publishes the temperature equivalents. Potters use cone numbers instead of degrees, and the zero matters: cone 06 is low fire, cone 6 is mid fire. The pottery guide linked above explains cones in more detail.
The table joins Orton's chart with real products. Temperatures are Orton's figures for its self-supporting cones heated at 108°F (60°C) an hour near the end of the firing.
Scroll sideways for all 5 columns.
| Your clay and kiln | Temperature (Orton) | Clay example, maker data | Glaze label to look for | Product examples from makers' pages |
|---|---|---|---|---|
| Low-fire earthenware, cone 06–04 | 1828–1945°F (998–1063°C) | Laguna EM100: cone 06, absorbs 11.5% water | Cone 06, 05 or 04 | Mayco Stroke & Coat: "formulated to mature at cone 06/05". AMACO Velvet underglaze: cone 05–10, so at least cone 05 |
| Mid-fire stoneware, cone 5–6 | 2167–2232°F (1186–1222°C) | Laguna B-Mix 5: cone 5, absorbs 2.3% | Cone 5–6 | AMACO PC-17 Honey Flux: "Glaze fire to Cone 5-6." Many Stroke & Coat colors, with cone 6 results noted per jar |
| High-fire stoneware and porcelain, cone 10 | 2345°F (1285°C) | Check the clay bag | Cone 10 | Mayco says Stroke & Coat can be fired up to cone 10. AMACO says some Velvet pigments "burn out at higher temperatures" |
Earthenware stays porous after firing; the absorption figures show how much. That is why the glaze on a low-fire mug has to do the waterproofing. The US Food and Drug Administration calls earthenware "a porous form of clay which must be glazed in order for the pottery to hold food or liquid".
Worked example: a cone 06 jar in a cone 6 kiln
Say your studio fires glaze at cone 6, and you bought a jar marked cone 06. By Orton's chart, cone 6 is 2232°F and cone 06 is 1828°F. Your glaze would see about 404°F (224°C) more heat than it was made for. A glaze fired that far over its range can melt too much, and Digitalfire notes that a glaze that "melts too much" runs off the ware. The potter and author Linda Bloomfield's guide to glaze faults links blisters to "overfired glazes", and Digitalfire adds that "commercial underglazes often melt too much by cone 6".
The reverse is no better. A cone 6 glaze in a cone 06 firing will not melt properly. Bloomfield says pinholes can occur in "underfired or viscous glazes". The FDA warns that a lead glaze that is "not properly fired" may not fuse and can get into food.
Now the exception. Mayco says "Many Stroke & Coat® glazes perform well at mid-range (cone 5/6)" and that cone 6 performance is "noted on each color's label". So the rule is not "low-fire glaze never goes in a cone 6 kiln". The rule is: the jar's own label decides. If the label does not name your cone, do not use it at that cone.
Stop here and check. Before you buy, ask your studio which cone it fires for glaze. Then hold the jar and find that number on the label.
No kiln? Then it is not glaze
You cannot fire ceramic glaze in a home oven. Even the lowest glaze firing in the table, cone 06, is 1828°F (998°C) on Orton's chart. "Oven-bake" ceramic paints are a different product. KREUL is a German paint maker. It tells users of its glass and porcelain paint to bake it at 160°C (320°F) for 90 minutes. It also says: "Do not paint the area used for eating / drinking, e.g. drinking rims." If you have no kiln, use a firing service or a studio. The pottery guide linked at the top lists the options.
What "food safe" and "dinnerware safe" mean on a jar
"Food safe" means the fired glaze passed a lead and cadmium release test. It does not mean the surface is tough enough for daily use. For a mug, look for both: the food-safety mark and a statement that the glaze suits dinnerware or food surfaces.
Scroll sideways for all 3 columns.
| Label or mark | What the maker says it means | Source |
|---|---|---|
| Food safe | "a finished, fired piece does not release lead & cadmium above strict legal limits". AMACO tests to ASTM C738-94 | AMACO |
| Dinnerware safe / suitable for dinnerware | Durability: "chemically durable enough to resist scratching" (AMACO). Mayco: when fired as instructed, "glaze is suitable for dinnerware" | AMACO, Mayco |
| Suitable for dinnerware with clear | Mayco's middle icon: "Use a compatible clear glaze or other glaze suitable for dinnerware" over it | Mayco |
| Decorative use only | "Not recommended for the food-contact or lip and rim areas of dinnerware" | Mayco |
| AP seal | "safe for all ages when used as intended". A statement about using the product as an art material, not about your soup bowl | AMACO |
| CL seal | The product is "certified to be properly labeled" with a caution. Mayco says such products "should never be given to children age 12 and under". On some AMACO glazes the CL warning is about soluble copper | Mayco, AMACO |
Mayco answers one question directly: does an AP or CL seal mean a glaze suits dinnerware? Its answer is "No". Those are art-material seals from the Art & Creative Materials Institute (ACMI).
You may also miss the words "lead-free" on newer jars. Mayco says it does not use lead compounds as ingredients, but its products "will no longer be labeled 'Lead-Free'". It gives the reason that such terms are "increasingly restricted by regulations and subject to legal scrutiny", and says the formulas did not change. The same page adds that it is "NOT illegal for a foodware item to contain traces of lead or cadmium", as long as they test below the FDA thresholds. So "food safe" means "tested below the limit", not "zero".
What the label cannot promise. Both makers say your clay, your coat and your kiln can change the result. Mayco names four things that "will affect the fired results": the clay body, how thick the glaze goes on, the firing process and the temperature. AMACO says a glaze can "microscopically crack (craze)" on one stoneware and not on another, so "customers have to test the final durability in your own studio". If you sell your pots, Mayco is clear that testing is your job: "Finishedware producers bear responsibility for food-contact testing of ware sold into commerce."
The same AMACO page explains why some glazes stay off food even after passing the lead test. Specialty glazes such as Cosmos or Kiln Ice fire "too soft or has tiny cracks" that "will scratch under metal forks and trap food bacteria over time". AMACO's advice is to keep those on the outside and use "smooth, glossy glazes for surfaces that touch food".
That does not make every matte glaze unsafe. Digitalfire writes that a functional matte must resist cutlery marks, "clean well and not leach into food and drink". It adds that a matte which melts well "could be among the most functional glazes available". For a first mug, a glossy liner is the easy choice. A matte one is fine if its maker labels it for dinnerware.
One more point for shared kilns. The FDA notes that traditional potters who switched to lead-free glazes but kept old kilns can contaminate their "lead free" pottery with lead residue left from past firings. Ask your studio whether its kiln ever fired lead glazes. Worried about an old or souvenir pot? You cannot see lead. The FDA says home lead-test kits with swabs are sold in hardware stores and online. If one shows leachable lead, the FDA strongly advises against using the piece for food or drink. For the full checklist of what makes a piece fit for food, see our guide to functional art you can actually use.
How to apply glaze: brush, dip or pour
Brush if you glaze a few pieces at home from pint jars. Dip or pour if your studio keeps buckets of glaze. Whichever you choose, start with clean bisque and a clean foot.
Glaze is a wet mineral slurry, and some glazes contain toxic metals. Treat it as a workshop material, not paint. Read the safety data sheet first, wear gloves, keep food and drink off the table, and wipe drips before they dry into dust. The details are in the safety section below.
Before any method:
- Wipe the bisque. Dust and hand grease stop glaze from sticking. Bloomfield's fix for crawling includes sponging dusty or greasy bisque before glazing. Use a barely damp sponge; Bloomfield lets the bisque dry overnight before glazing.
- Keep the bottom bare. Glaze on the foot welds the pot to the kiln shelf. Firing services can refuse it. Clay-King's service lists "No glaze on the bottom" and charges $15 a shelf for glaze runs. Paint wax resist on the foot, or wipe it clean with a sponge, and leave a bare band just above it.
- Stir the glaze. Heavy particles settle in the jar. Stir until no sludge sits at the bottom.
Scroll sideways for all 4 columns.
| Method | Best for | How | Watch out for |
|---|---|---|---|
| Brush | Pint jars, a few pieces at home | Load a soft, wide brush and lay the glaze on in strokes. Let each coat dry until it loses its shine, then add the next one across the last | Too few coats leave streaks. Mayco suggests "2-3 coats for full opacity and all over coverage" for Stroke & Coat; read your own jar |
| Dip | Studio buckets, even coats, many pieces | Hold the piece with tongs or by the foot, dip it in one smooth movement and lift it out. Shake off drips and touch up finger marks | Dipping and brushing glazes are not interchangeable. AMACO warns that "Dipping glazes behave differently from brushing" and need testing before layering |
| Pour | The inside of mugs and vases | Pour glaze in, swirl it to coat the inside, and pour it back out. Wipe the rim. Then glaze the outside separately | Glaze pooling in the bottom of the mug. Tip it out fully |
How thick is right? Digitalfire puts most common glazes at about "credit-card-thickness" once applied. Thicker is not safer. The same page lists running, crawling and clouded clear glazes as typical results of glaze that is too thick.
Layering two glazes is where many surprises happen. Digitalfire explains that a second layer "rewets the first layer, stressing its bond with the body", which can lead to crawling. Mayco adds that a combination is not automatically fit for dinnerware, even if both glazes are. Layer on the outside first, and on test tiles before pots.
Stop here and check before firing. Turn the piece over: the foot and the band above it are bare. Look along the surface in side light: no bare dust patches, no thick drips near the bottom. Fix it now. Once the glaze is fired, it stays where it ran.
Why did my glaze do that? Symptom, cause, fix
Many first-glaze faults trace back to three things: the coat was too thick or too thin, the bisque was dusty, or the glaze and clay do not fit. Find your symptom below. The cause given is the likely one, not the only one.
Scroll sideways for all 4 columns.
| What you see | Likely cause | Fix next time | Source |
|---|---|---|---|
| Crawling: glaze pulled into beads or islands, with bare clay between | Glaze cracked as it dried, then pulled back in the kiln. Often too thick, layered, or on dusty bisque | Thinner coat, sponge the bisque first, test layers before using them on a pot | Bloomfield, Digitalfire |
| Pinholes: tiny holes in the fired surface | Gas escaped from the clay but the glaze did not heal over. Bloomfield links it to underfired or stiff glazes. Digitalfire adds that a coat that is too thin can pinhole too | Fire to the label's cone. Ask whether the kiln can hold at top temperature; Bloomfield suggests a soak of half an hour | Bloomfield, Digitalfire |
| Crazing: a fine net of cracks in the glaze | The glaze is "too small for the clay body", so it cracks as it cools | Try a different glaze on that clay, or another clay. Keep crazed pieces away from food | Bloomfield, AMACO |
| Shivering: flakes of glaze chipping off edges and rims | The opposite of crazing: the glaze is "too big for the clay body". Bloomfield calls it "a more serious fault" | Stop using the piece for food or drink. Change the glaze or clay | Bloomfield |
| Blisters: craters and bubbles, sometimes with sharp edges | Overfired glaze. Bloomfield warns blisters "can cause sharp edges, which render functional ware unsafe to use" | Check the cone; fire to the label's range | Bloomfield |
| Running: glaze slid down onto the foot or the shelf | Too thick near the bottom, a fluid glaze, or a glaze that melted too much (fired hotter than its range) | Thinner coat on the lower third, a wider bare band at the foot | Digitalfire, Digitalfire on runny glazes, Clay-King |
Not every fault can be fixed after firing. Bloomfield says blisters can be ground down and refired. A crazed or shivered mug is a planter or a pen pot now, and that is a perfectly good job for it.
Glaze safety: dust, lead and barium
Buy liquid, ready-made glazes from a maker that labels them, and read the label and the safety data sheet. Mixing glaze from powders and internet recipes is a later skill, not a first-month one.
The UK Health and Safety Executive's sheet on glaze and colour preparation is written for workplaces, but its main points fit a home table:
- Choose ready-made and wet. HSE says to "Buy in glaze ready for use, when possible" and to pick a non-powder format to reduce dust.
- Get the safety data sheet. It is HSE's first main point. The SDS lists what is in the jar and what protection it needs.
- Silica is not the only hazard. HSE notes glazes may contain other hazardous substances, "eg. lead, cobalt, cadmium". Its silica sheet puts the crystalline silica in glazes and colors at 10% to 60% of their dry weight.
- Clean wet. "Vacuum dry dust or use wet cleaning methods", and avoid brushes or compressed air on surfaces. Wipe drips before they dry into dust.
- Gloves and hands. HSE recommends gloves suitable for the substances in the glaze and for wet work, and washing hands before eating, drinking or smoking.
Barium is a reason to stay with labelled glazes. Barium carbonate appears in some matte glaze recipes, and it is toxic. Digitalfire flags one recipe with almost 30% barium carbonate for "serious durability and barium-release concerns". You cannot see that by looking at a glaze. Note what the food-safe test covers: AMACO's definition and its ASTM C738-94 testing are about lead and cadmium release only. Barium is not part of that label. So for food surfaces, use a glaze its maker labels food safe and recommends for dinnerware, which means AMACO or Mayco has also judged its durability. A recipe from a forum has been through neither.
A first exercise: one test tile per glaze
Before you glaze a pot, make one test tile for each glaze you plan to use. AMACO itself recommends "firing glazed test tiles before using each new batch number of glaze." Here is a suggested exercise, not a result we can report:
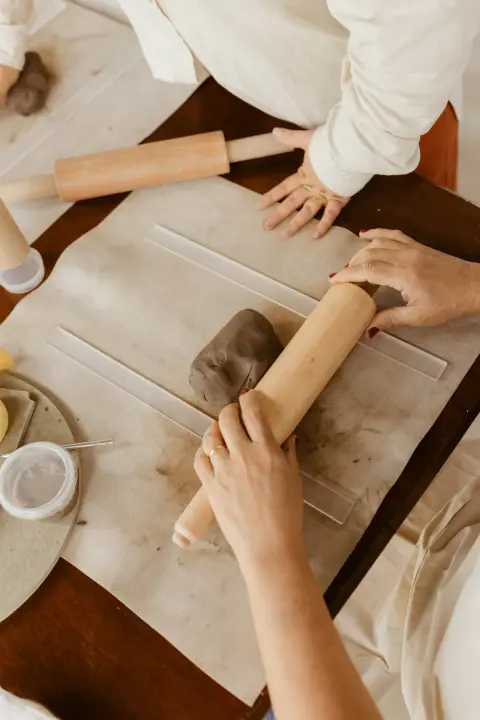
- Roll a slab of the same clay as your pots and cut strips about 1 × 4 inches. Bend each into an L, so the tile stands upright in the kiln. The slab steps are in our hand-building guide.
- Bisque the tiles with your pots.
- Brush one glaze per tile: one coat on the top third, two in the middle, three at the bottom. Leave the foot bare.
- Write the glaze name, coats and cone on the back with underglaze or an iron-oxide pencil.
- Fire the tiles in the same kiln, at the same cone, as your pots.
Afterwards, compare the three bands in daylight. Look for crawling, pinholes and fine cracks, and check whether the glaze ran toward the foot. The band that looks right is your number of coats on that clay. Keep the tiles. In a year, that shoebox of tiles will be the most useful glaze chart you own.